Light is a vital element in architecture. A magnificent building can take on a new life with the interplay of light and shadow. But capturing this grandeur in photography is a major challenge. Sometimes, brightly lit windows make the interior look dark and lifeless, or conversely, delicate details in the shadows are lost in a photo of the building's exterior. This is where the HDR (High Dynamic Range) technique comes in to solve this problem. If you are looking for professional interior architectural photography in New York, or have a project that requires images of the highest quality, understanding this technique is essential for you.
What is HDR and why is it important in architectural photography?
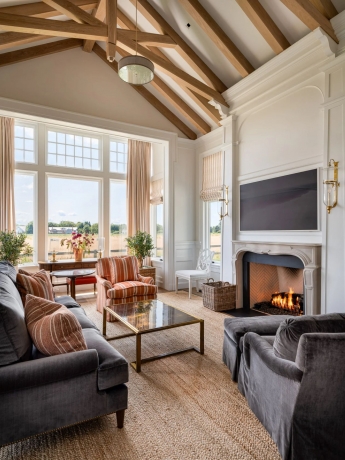
In simple terms, Dynamic Range refers to the difference between the brightest and darkest parts of a scene that your camera can capture. The human eye can see this difference well, but camera sensors have limitations. For example, when you take a photo of an interior space with large windows, the camera either adjusts the exposure for the interior, in which case the windows are captured as a white, featureless blob, or it adjusts the exposure for the windows, in which case the interior becomes completely black.
HDR solves this problem by allowing you to create an image that shows both precise details in the shadows and captures stunning highlights with unparalleled quality. This technique works by combining several photos with different exposures (from very bright to very dark) into a single image, producing a final photo with a very wide dynamic range.
Key tips for successful HDR architectural photography
Use a tripod: This is your most important tool for HDR photography. For accurate image blending, it's crucial that the camera remains perfectly still throughout the capture of all the photos. The slightest shake can cause blurring in the final image.
Shoot in RAW mode: The RAW format captures more information than JPEG and gives you more flexibility in post-processing. This helps you extract more detail from the shadows and highlights.
Use Bracketing: Bracketing is a feature in cameras that allows you to automatically and consecutively capture multiple photos with different exposures (e.g., -2, 0, and +2). This speeds up your workflow and prevents any unwanted camera shake.
Choose the subject: HDR yields the best results in scenes with high light contrast, such as an interior with large, bright windows, or a historic building where one part is in shadow and the other is under direct sunlight.
")
Answering highly searched questions about HDR
1. "What are the best HDR software programs?"
There are many software programs for combining and editing HDR images. Adobe Lightroom and Adobe Photoshop are two popular and powerful options that offer advanced features for this task. Aurora HDR is also specialized software designed specifically for creating HDR images and produces very appealing results. The best choice depends on your skill level and needs.
2. "How many photos do I need for HDR?"
The number of photos depends on the light contrast in the scene. For scenes with medium contrast, 3 photos are usually sufficient (one with standard exposure, one underexposed, and one overexposed). But for scenes with very high light contrast, you might need 5 or even 7 photos to capture all the details.
3. "Can I use HDR for night photography?"
Yes, HDR is also very useful for night photography. This technique helps you capture the lights of streets and buildings without losing details in the shadows. For architectural photography in Canada, which often includes night images of cityscapes, HDR can make a significant difference in the final quality. The only thing to note is that due to low light, you will need more photos and must definitely use a tripod.
4. "Should all architectural photos be HDR?"
No. The use of HDR depends on the scene. In some cases, an image with a smaller dynamic range and more contrast can be more appealing. Also, if the subject is moving (like people in a lobby), HDR can cause "ghosting" in the final image. In these cases, it's better to use single-exposure shots and make adjustments in editing software if needed.
Tips for post-processing
Editing is an important part of the HDR process. Raw HDR photos often look unnatural and "washed out." To get a beautiful and natural-looking image, pay attention to the following tips:
Reduce saturation: HDR images often have very saturated colors. A slight reduction in saturation can create a more realistic image.
Increase contrast: Proper contrast makes the image more vibrant. This way, you can reveal more details in the shadows and highlights.
Adjust details: Using "Clarity" and "Sharpening" tools, you can make architectural details more prominent.
Remove ghosting: If your images had moving subjects, use "ghosting" removal tools in editing software.
Final thoughts
Using HDR in architectural photography is not just a technique, but an art. It allows you to capture details that might be overlooked with the naked eye. By practicing and mastering this technique, you can create stunning and lasting images of architectural projects that showcase the true value of their design and construction. If you are looking to capture images that represent your projects in the best possible way, HDR will be a powerful and essential tool in your toolbox.


